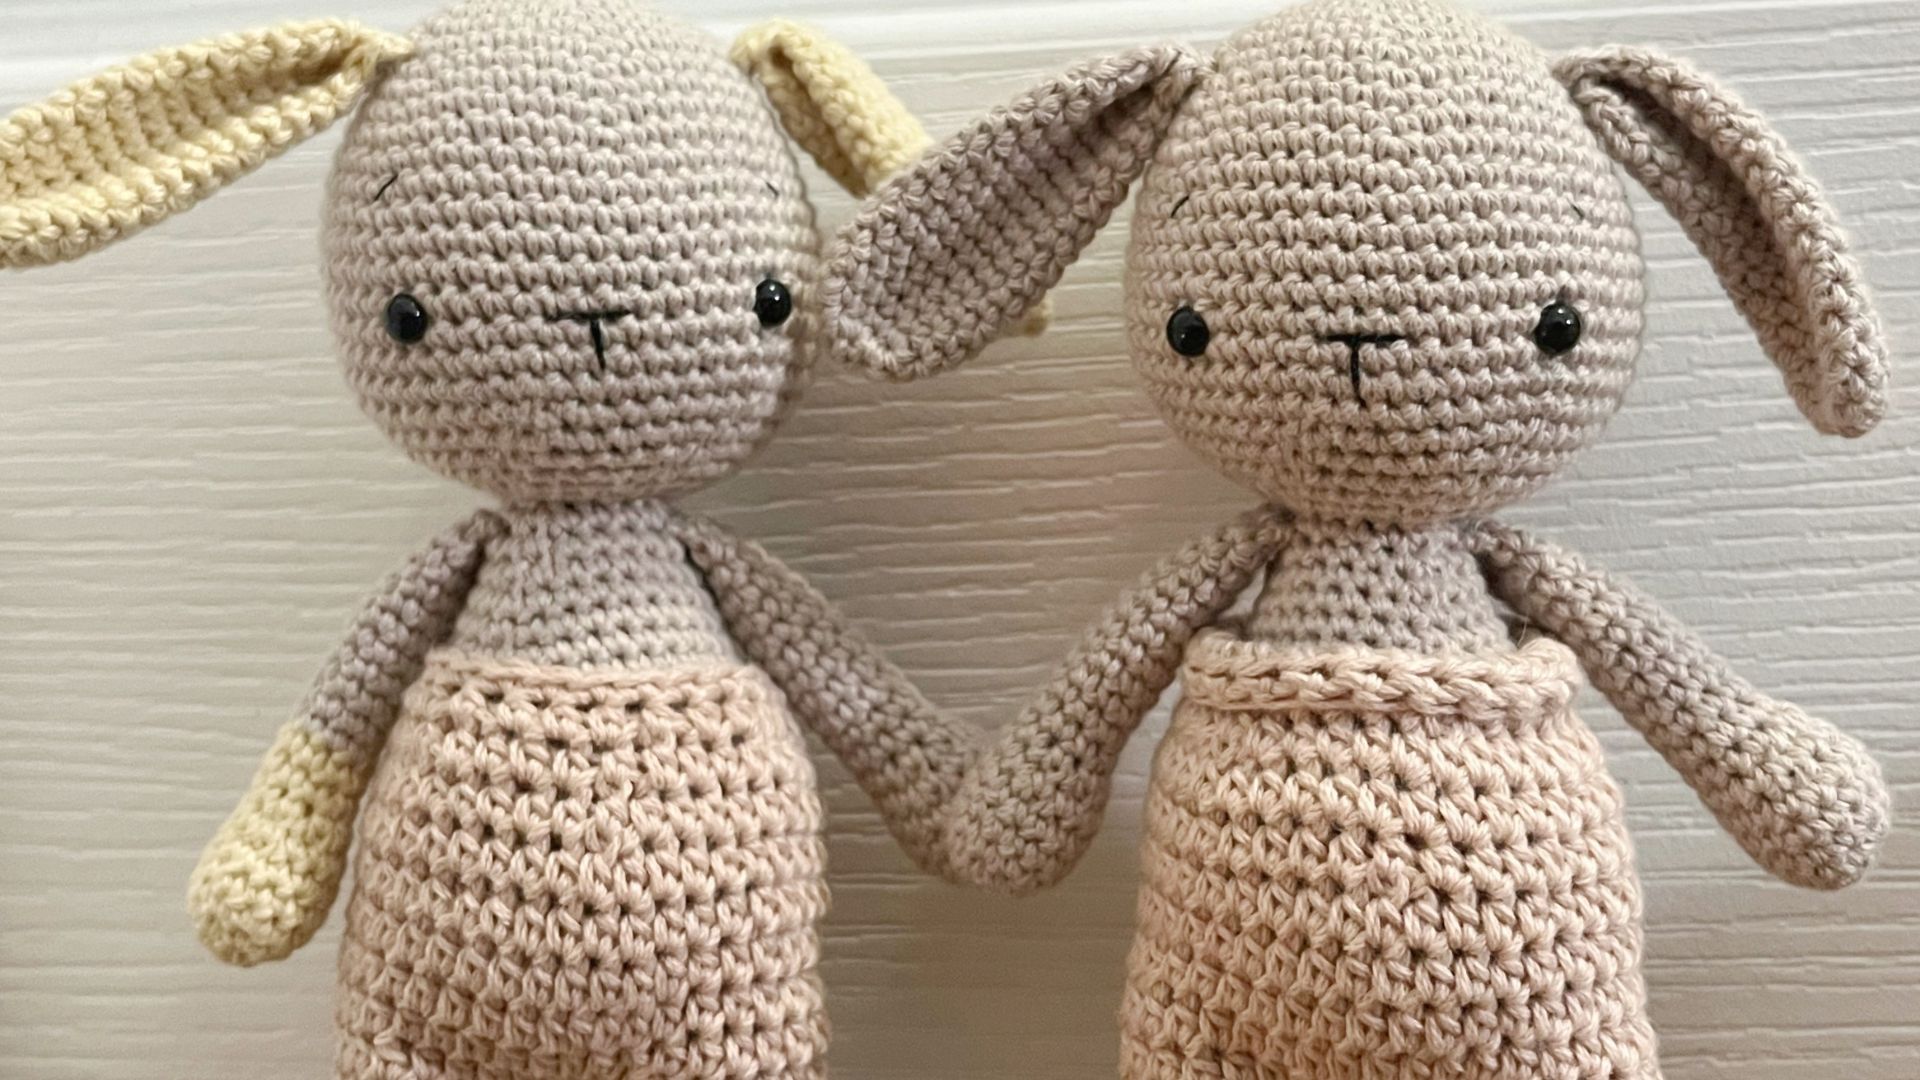
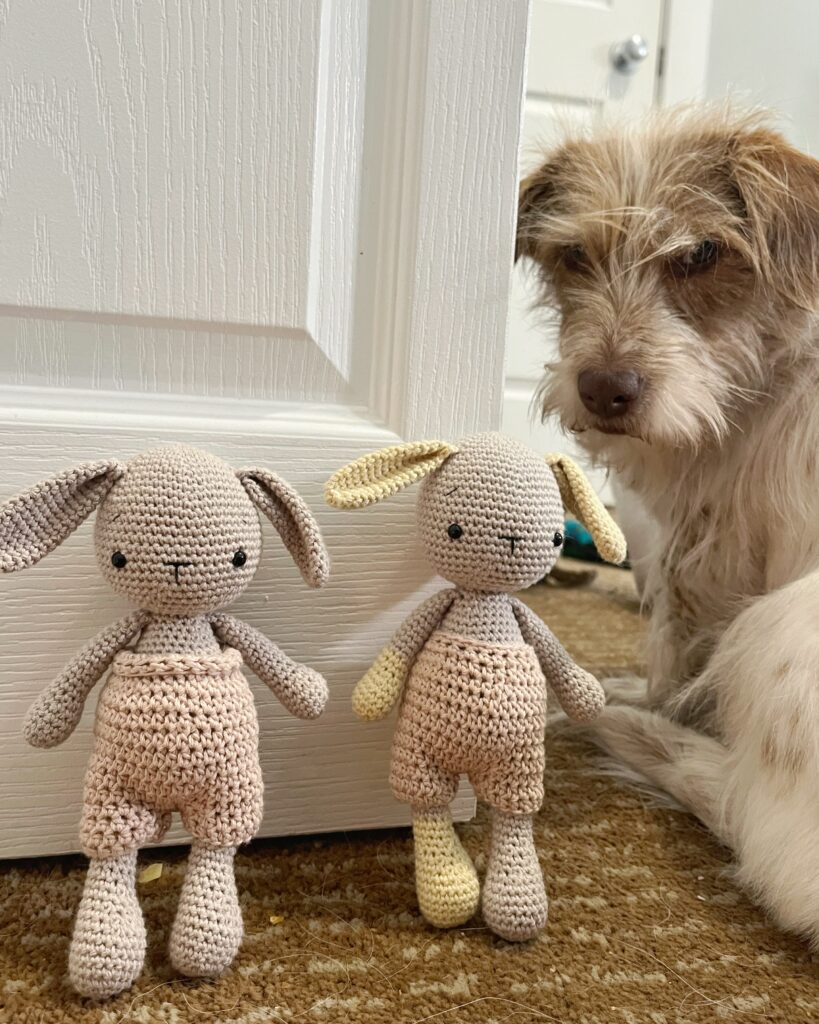
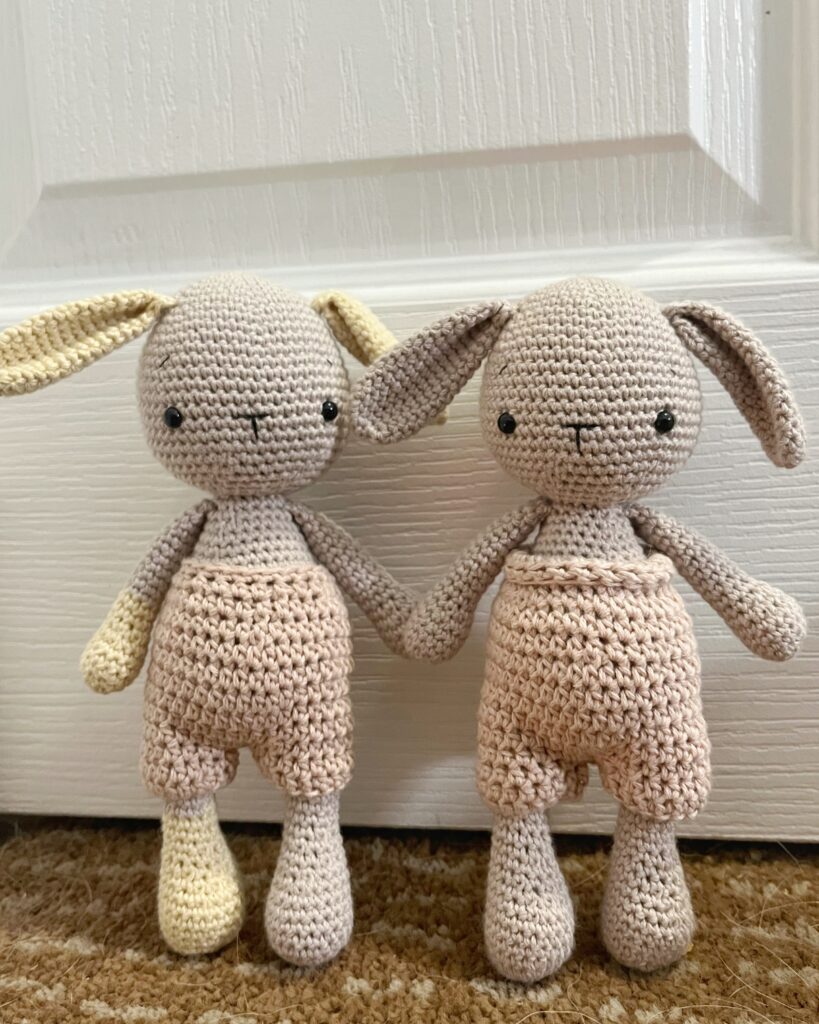
Meet Nibbles the snuggly bunny! He is a fun, easy, and quick crochet project. He loves going on adventures, eating carrot cake and exploring nature. His outfit is removable, so have fun making him a wardrobe of different coloured pants to match the seasons!
Details
- Finished size: 7.5” (19 cm) tall x 3” (7.5 cm) wide (when made with the same yarn and hook used in the pattern).
- Construction: Worked mostly in continuous rounds. Pieces are crocheted and stuffed separately, then sewn together.
Yarn
- One 50g ball in the body colour and less than 50g in the pants colour.
- Yarn used in the pattern is Krea Deluxe Organic Cotton.
Tools
- 2.5 mm crochet hook
- 6 mm safety eyes
- Scissors, tapestry needle and stuffing
- Stitch markers and row counter
- Lighter (for safety eyes) and blush (for cheeks)
Notes
- Use stitch markers to help track rounds.
- Turning and joining chains do not count as stitches unless stated otherwise.
- To change colours, pull through in the new colour when completing the stitch before the change.
- References to the left and right body parts are based on the character’s perspective.
Copyright
- You are welcome to sell items made from this pattern, just mention that it is a Pleasant Crochet pattern.
- The written pattern is for personal use only (no selling, reproducing or altering parts of it).
Abbreviations (US Terminology)
- rnd / rnds = round / rounds
- st / sts = stitch / stitches
- sl st = slip stitch
- rep = repeat
- ch = chain
- sc = single crochet
- inc = increase
- dec = invisible decrease
- hdc = half double crochet
- (…) = repeat instructions within the brackets
- […] = stitch count at the end of a round or row
Need some extra help?
- Refer to the image gallery at the end of this pattern for photos of challenging steps.
Head
Rnd 1: start 6 sc in a magic circle [6]
Rnd 2: inc in all 6 st [12]
Rnd 3: (sc in next st, inc in next st) rep 6 times [18]
Rnd 4: (sc in next 2 st, inc in next st) rep 6 times [24]
Rnd 5: (sc in next 3 st, inc in next st) rep 6 times [30]
Rnd 6: (sc in next 4 st, inc in next st) rep 6 times [36]
Rnd 7: (sc in next 5 st, inc in next st) rep 6 times [42]
Rnd 8: sc in all 42 st [42]
Rnd 9: (sc in next 6 st, inc in next st) rep 6 times [48]
Rnd 10: sc in all 48 st [48]
Rnd 11: (sc in next 7 st, inc in next st) rep 6 times [54]
Rnd 12-20: sc in all 54 st (9 rnds) [54]
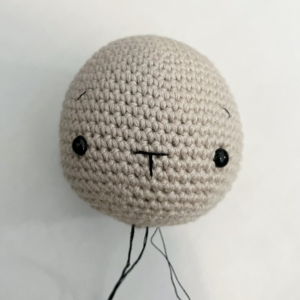
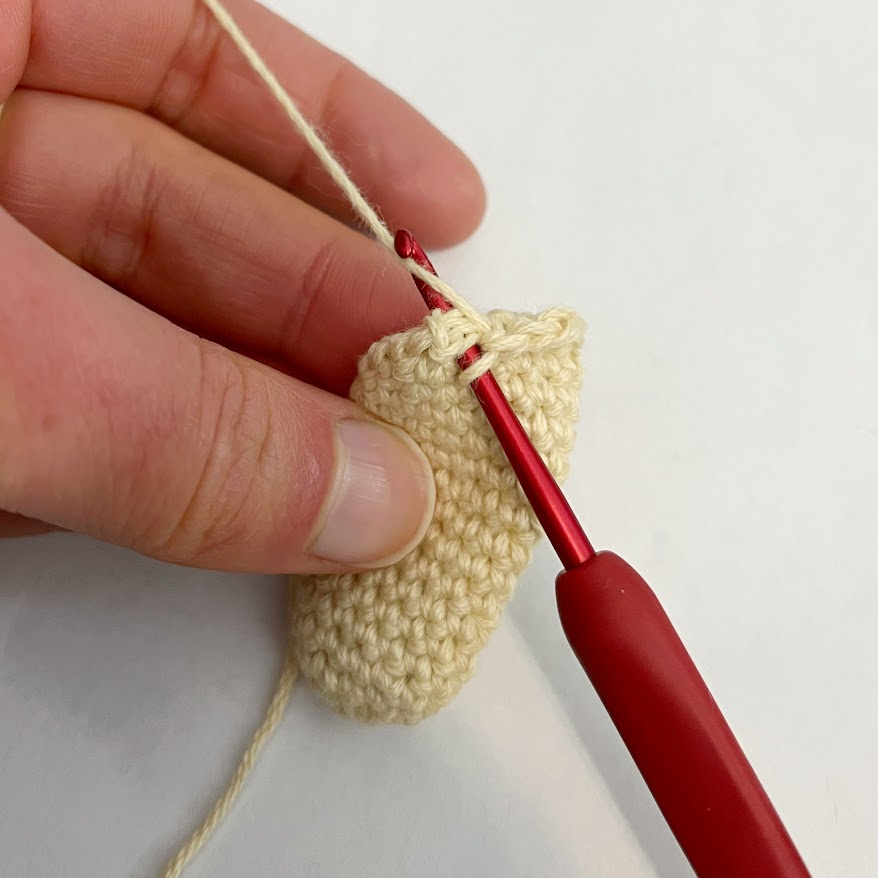
Insert the safety eyes between rounds 17 and 18, positioning them 12 stitches apart across the front of the head. To prevent the posts from catching in the stuffing, you can heat and flatten them with a lighter. Use caution not to burn yourself or the yarn. Using a single strand of embroidery thread, stitch the eyebrows over round 13. Stitch the nose between rounds 17 and 18, making it 3 stitches wide and 2 rounds tall (see picture 1).
Rnd 21: (sc in next 7 st, dec) rep 6 times [48]
Rnd 22: (sc in next 6 st, dec) rep 6 times [42]
Rnd 23: (sc in next 5 st, dec) rep 6 times [36]
Rnd 24: (sc in next 4 st, dec) rep 6 times [30]
Rnd 25: (sc in next 3 st, dec) rep 6 times [24]
Begin stuffing the head and continue stuffing as you go.
Rnd 26: (sc in next 2 st, dec) rep 6 times [18]
Rnd 27: (sc in next st, dec) rep 6 times [12]
Rnd 28: (dec) rep 6 times [6]
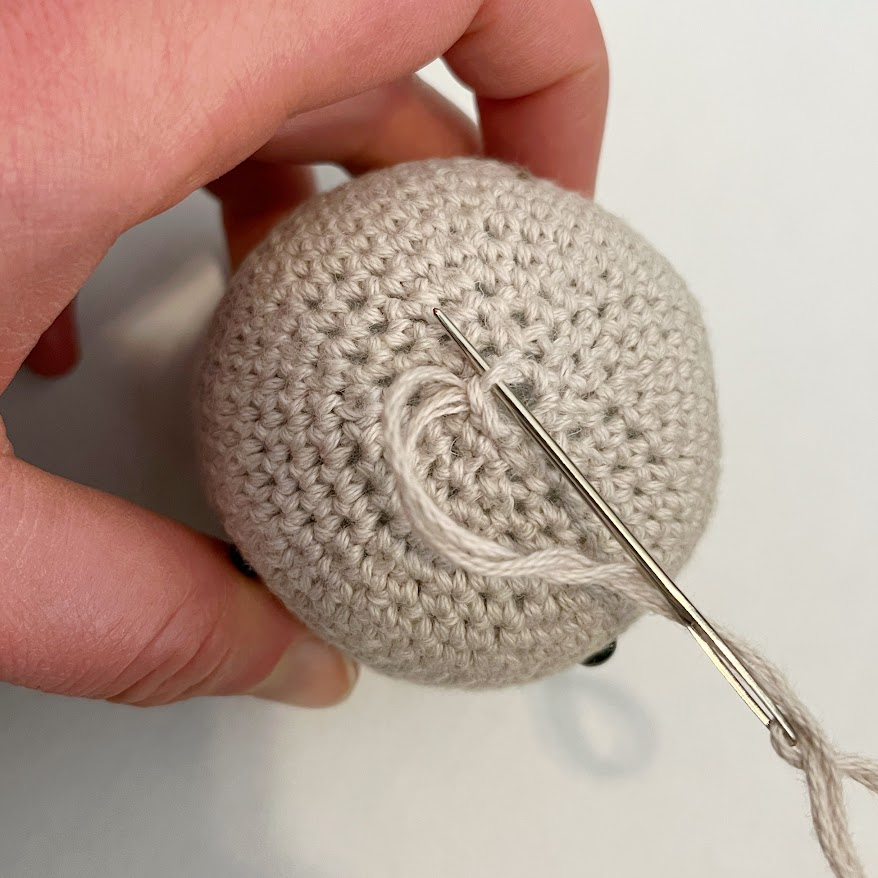
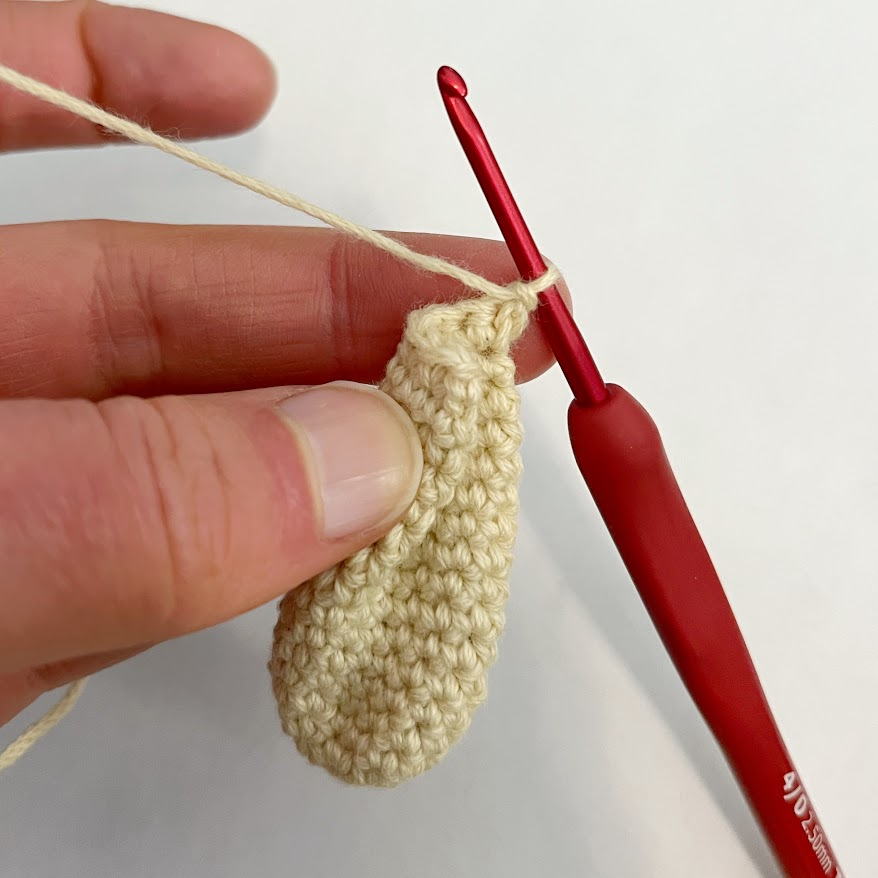
Sl st in next st and fasten off, leaving a long yarn tail. Finish stuffing the head. Using a yarn needle, weave the yarn tail through the front loop of each stitch in round 28, working from the centre outward (see picture 2). Pull tight to close and weave in the yarn end.
Body
Rnd 1: start 6 sc in a magic circle [6]
Rnd 2: inc in all 6 st [12]
Rnd 3: (sc in next st, inc in next st) rep 6 times [18]
Rnd 4: (sc in next 2 st, inc in next st) rep 6 times [24]
Rnd 5: (sc in next 3 st, inc in next st) rep 6 times [30]
Rnd 6: (sc in next 4 st, inc in next st) rep 6 times [36]
Rnd 7: (sc in next 5 st, inc in next st) rep 6 times [42]
Rnd 8: (sc in next 6 st, inc in next st) rep 6 times [48]
Rnd 9-13: sc in all 48 st (5 rnds) [48]
Rnd 14: (sc in next 6 st, dec) rep 6 times [42]
Rnd 15: sc in all 42 st [42]
Rnd 16: (sc in next 5 st, dec) rep 6 times [36]
Rnd 17: sc in all 36 st [36]
Rnd 18: sc in next 5 st, dec, (sc in next 10 st, dec) rep 2 times, sc in next 5 st [33]
Rnd 19: sc in all 33 st [33]
Rnd 20: sc in next 5 st, dec, (sc in next 9 st, dec) rep 2 times, sc in next 4 st [30]
Rnd 21: sc in all 30 st [30]
Rnd 22: sc in next 4 st, dec, (sc in next 8 st, dec) rep 2 times, sc in next 4 st [27]
Rnd 23: sc in all 27 st [27]
Rnd 24: sc in next 4 st, dec, (sc in next 7 st, dec) rep 2 times, sc in next 3 st [24]
Rnd 25: sc in next 3 st, dec, (sc in next 6 st, dec) rep 2 times, sc in next 3 st [21]
Rnd 26: sc in next 3 st, dec, (sc in next 5 st, dec) rep 2 times, sc in next 2 st [18]
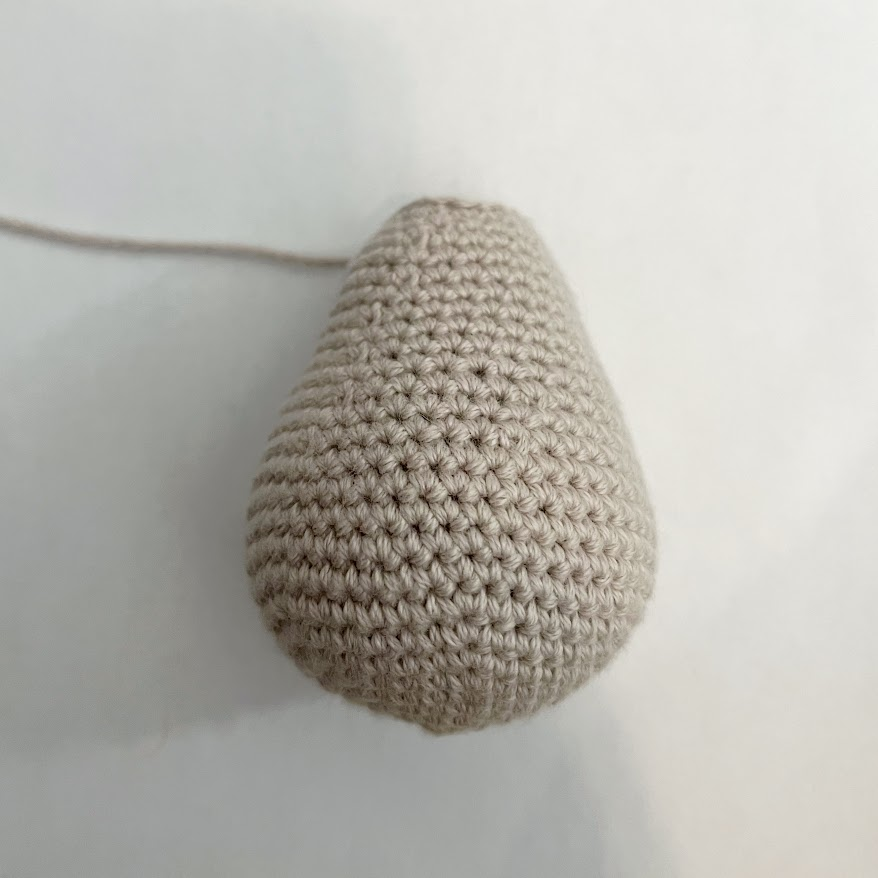
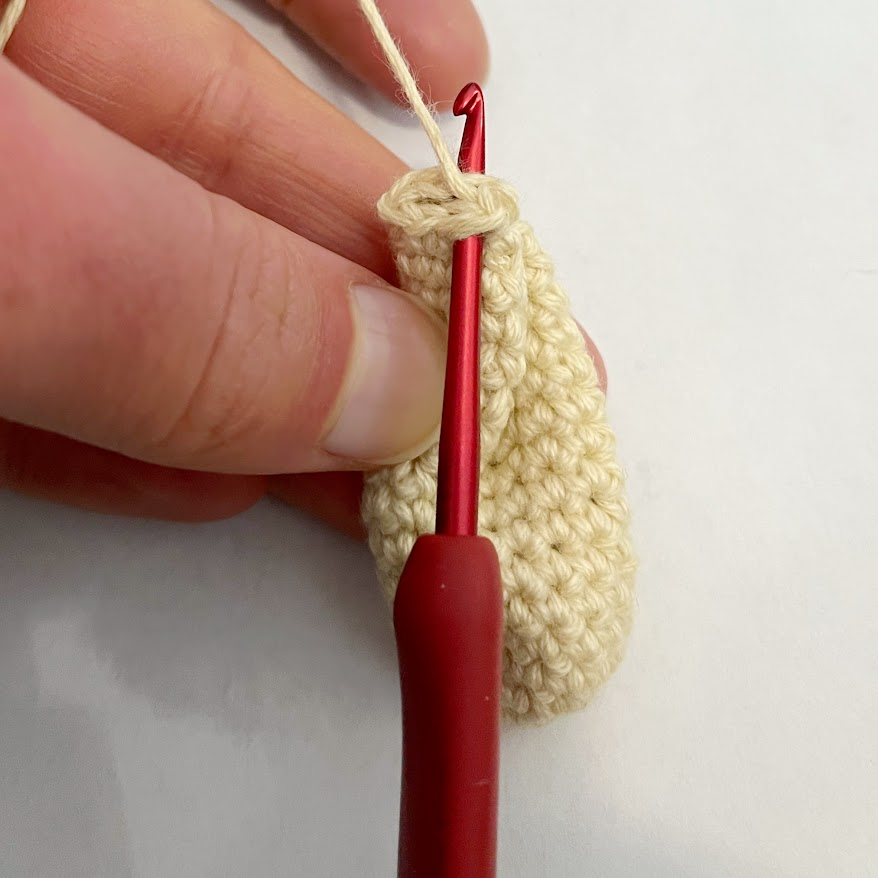
Sl st in next st and fasten off, leaving a long yarn tail for sewing. Stuff firmly (see picture 3).
Tail
Rnd 1: start 6 sc in a magic circle [6]
Rnd 2: inc in all 6 st [12]
Rnd 3: (sc in next 3 st, inc in next st) rep 3 times [15]
Rnd 4-6: sc in all 15 st (3 rnds) [15]
Rnd 7: (sc in next 3 st, dec) rep 3 times [12]
Rnd 8: (dec) rep 6 times [6]
Stuff lightly. Sl st in next st and fasten off, leaving a long yarn tail for sewing.
Arm (make 2)
Rnd 1: start 6 sc in a magic circle [6]
Rnd 2: inc in all 6 st [12]
Rnd 3: (sc in next 3 st, inc in next st) rep 3 times [15]
Rnd 4-6: sc in all 15 st (3 rnds) [15]
Rnd 7: dec, sc in next 9 st, dec 2 times [12]
Rnd 8: dec, sc in next 8 st, dec [10]
Rnd 9-19: sc in all 10 st (11 rnds) [10]
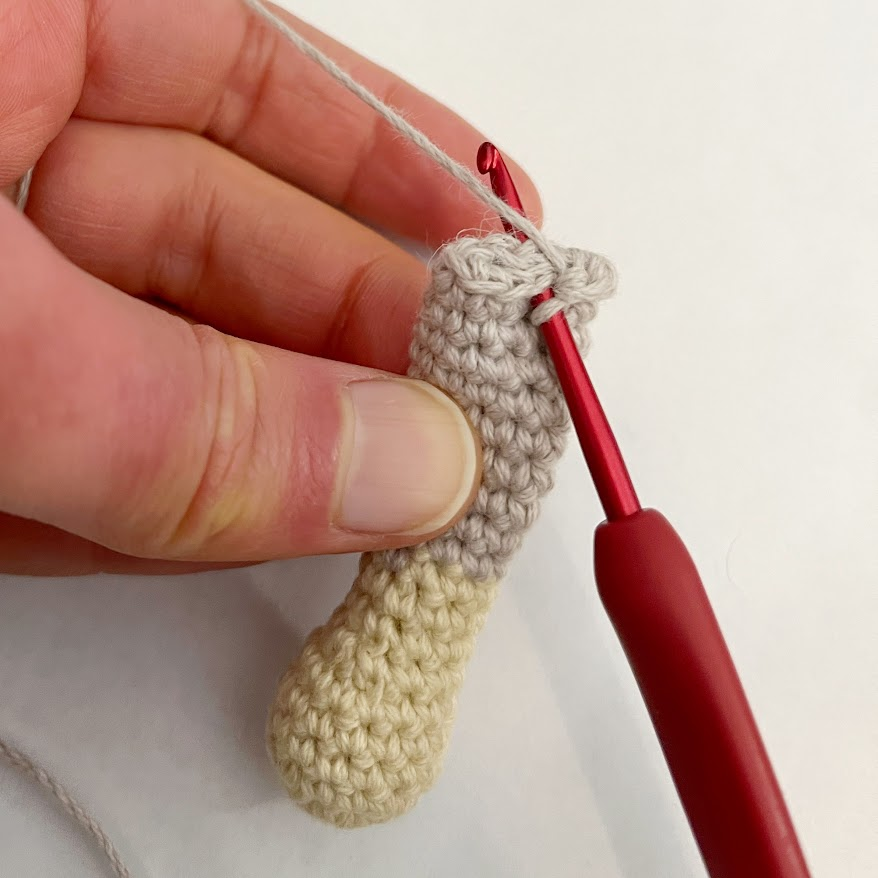
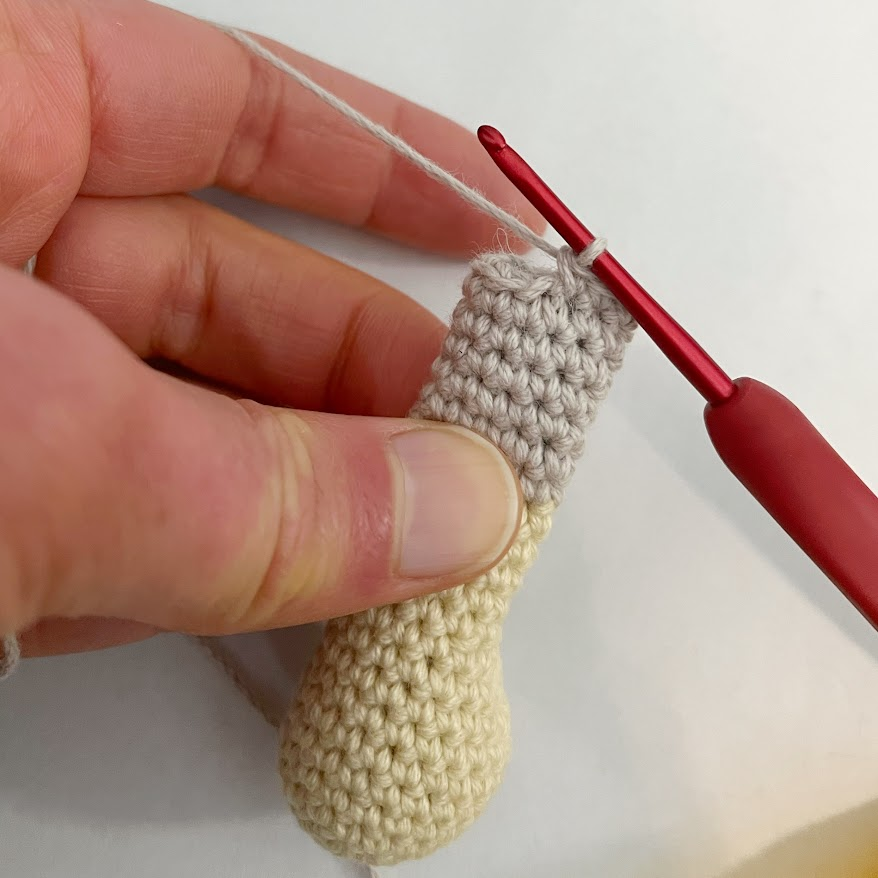
Stuff the hand firmly, using less stuffing toward the opening. Flatten the opening and sc in the next 5 st through both layers to close (see picture 4). Fasten off and leave a long yarn tail for sewing.
Ear (make 2)
Rnd 1: start 6 sc in a magic circle [6]
Rnd 2: inc in all 6 st [12]
Rnd 3: (sc in next 3 st, inc in next st) rep 3 times [15]
Rnd 4-15: sc in all 15 st (12 rnds) [15]
Rnd 16: (sc in next 3 st, dec) rep 3 times [12]
Don’t stuff. Flatten the opening and sc in the next 6 st through both layers to close. Ch 1, fold the ear again, and sc in the next 3 st through both layers. Fasten off and leave a long yarn tail for sewing (see pictures 5-8).
Leg (make 2)
Rnd 1: start 6 sc in a magic circle [6]
Rnd 2: inc in all 6 st [12]
Rnd 3: (sc in next st, inc in next st) rep 6 times [18]
Rnd 4: inc, sc in next 16 st, inc [20]
Rnd 5-8: sc in all 20 st (4 rnds) [20]
Rnd 9: dec, sc in next 16 st, dec [18]
Rnd 10: dec, sc in next 14 st, dec [16]
Rnd 11: sc, dec, sc in next 10 st, dec, sc [14]
Rnd 12: sc in all 14 st [14]
Rnd 13: dec, sc in next 10 st, dec [12]
Rnd 14-18: sc in all 12 st (5 rnds) [12]
Rnd 19: dec, sc in next 10 st [11]
Rnd 20-23: sc in all 11 st (4 rnds) [11]
Rnd 24 (Left leg): sc in next 5 st, leave remaining stitches unworked [5]
Rnd 24 (Right leg): sc in next 3 st, leave remaining stitches unworked [3]
Stuff the upper leg firmly, using less stuffing toward the opening. Flatten the opening and sc in the next 5 st through both layers to close (see pictures 9-10). Fasten off and leave a long yarn tail for sewing.
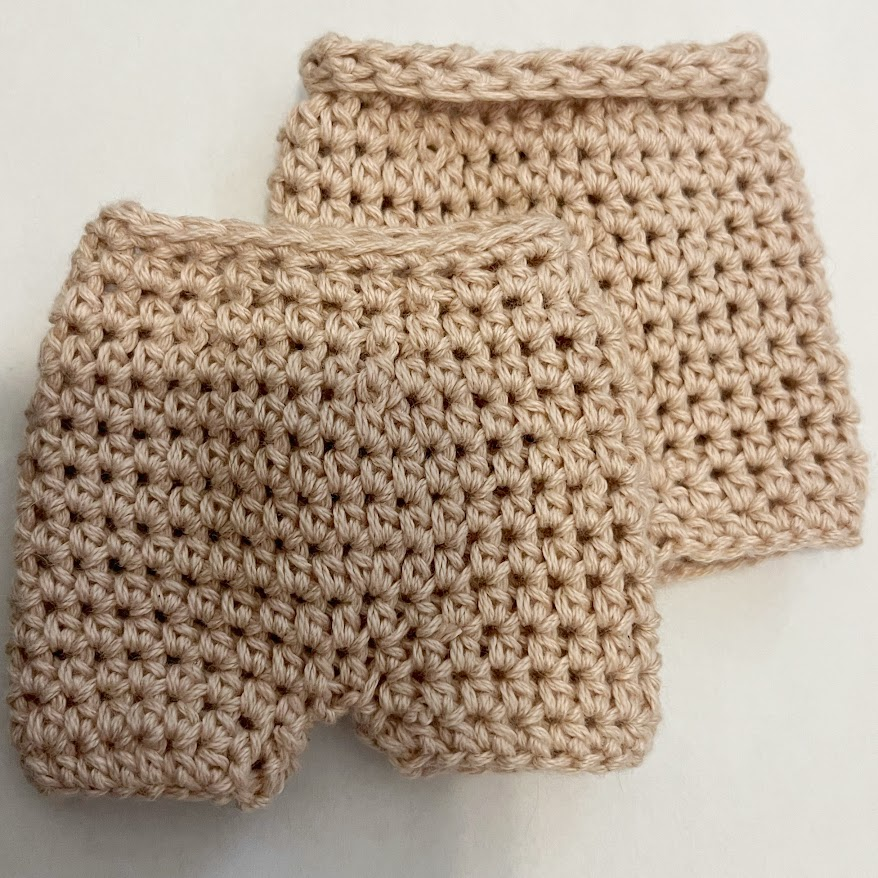
Pants
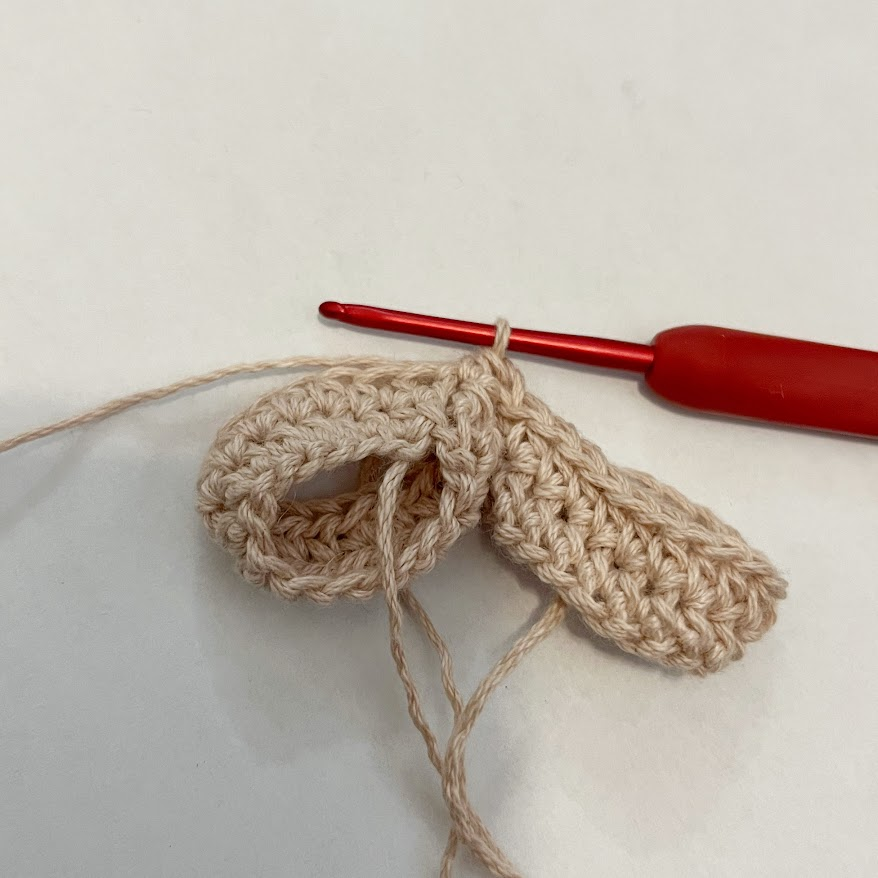
Ch 17. Leave a long starting yarn tail.
Rnd 1: join with a sl st to form a circle, hdc in all 17 ch [17]
Rnd 2: hdc in all 17 st [17]
Sl st in next st. Fasten off, leaving a long yarn tail (see picture 11).
Ch 17 and repeat rounds 1 and 2 to make a second pant leg. Do not sl st or fasten off this time, as we will now join the pant legs.
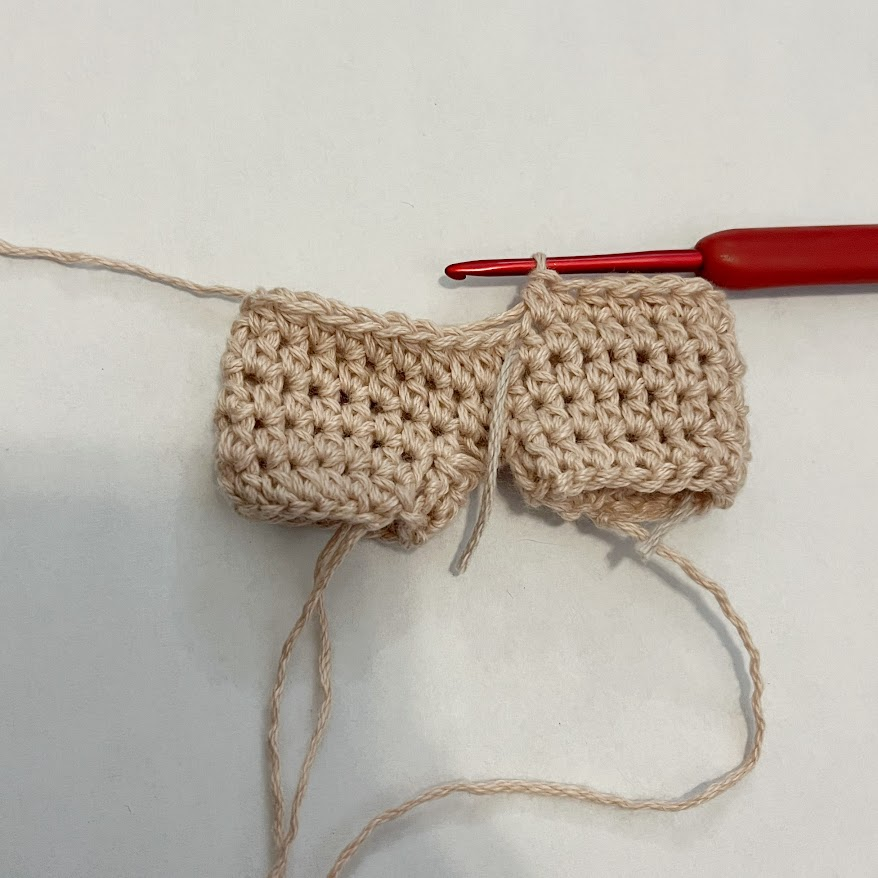
Rnd 3: ch 1, hdc in the first hdc of the first pant leg (the stitch you previously sl st into), hdc in next 16 st, hdc in the joining ch, hdc in next 17 st [36] (see picture 12).
Rnd 4: hdc in the joining ch, hdc in next 35 st [36]
Rnd 5: hdc in all 36 st [36]
Rnd 6: hdc in next st, hdc-inc, hdc in next 19 st, hdc-inc, hdc in next 14 st [38]
Use the yarn tail from the first pant leg to sew closed any gaps in the pants from joining (see picture 13).
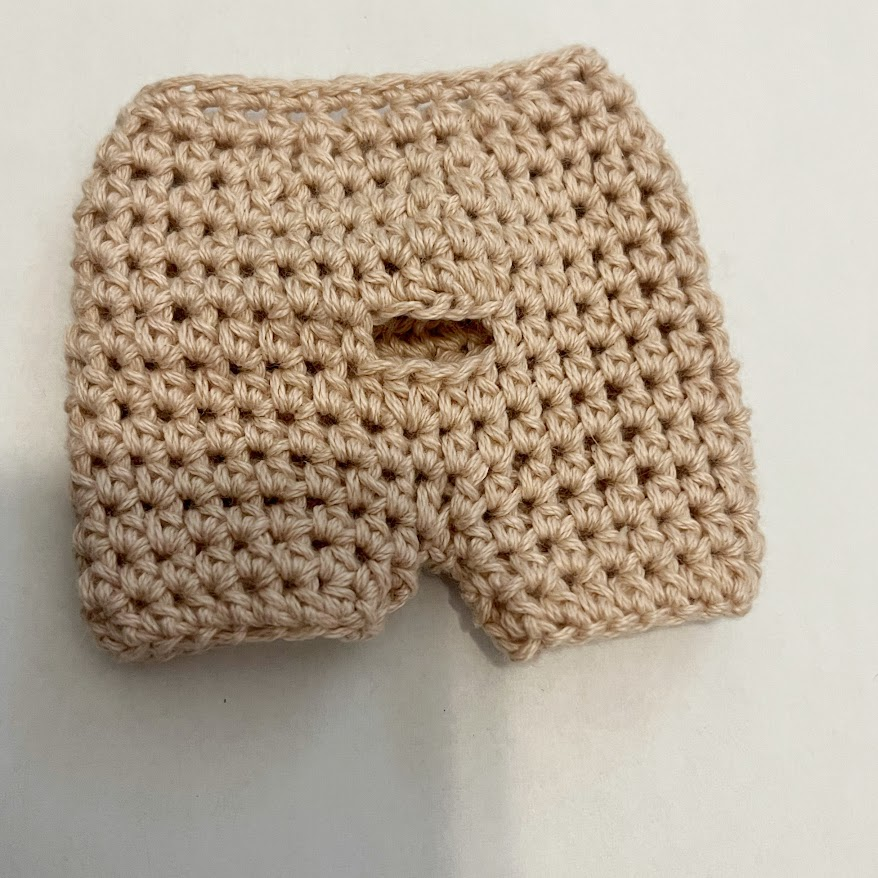
Rnd 7: hdc in next 21 st, ch 4, skip next 4 st, hdc in next 13 st [38]
Rnd 8: hdc in next 21 st, hdc in next 4 ch, hdc in next 13 st [38]
Rnd 9: hdc in all 38 st [38]
Rnd 10: hdc in next 4 st, hdc-dec, hdc in next 18 st, hdc-dec, hdc in next 12 st [36]
Rnd 11: (hdc in next 4 st, hdc-dec) rep 6 times [30]
Rnd 12: (hdc in next 3 st, hdc-dec) rep 6 times [24]
Rnd 13: sc in all 24 st [24]
Sl st in next st. Fasten off and weave in the yarn ends (see pictures 14-15).
Assembly
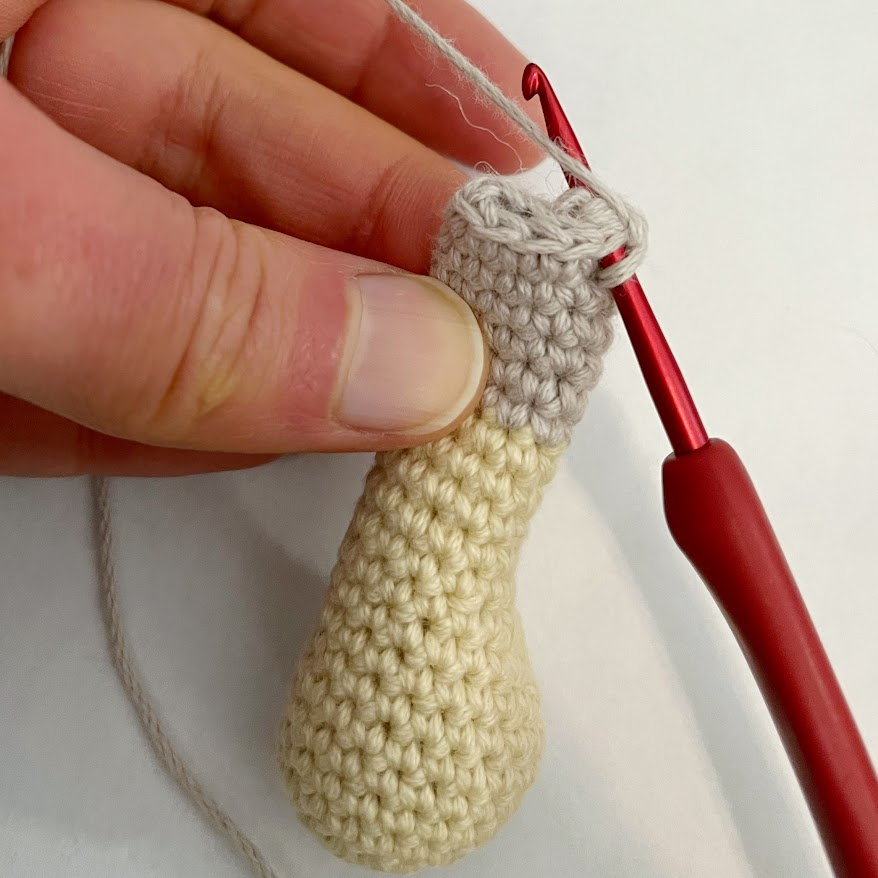
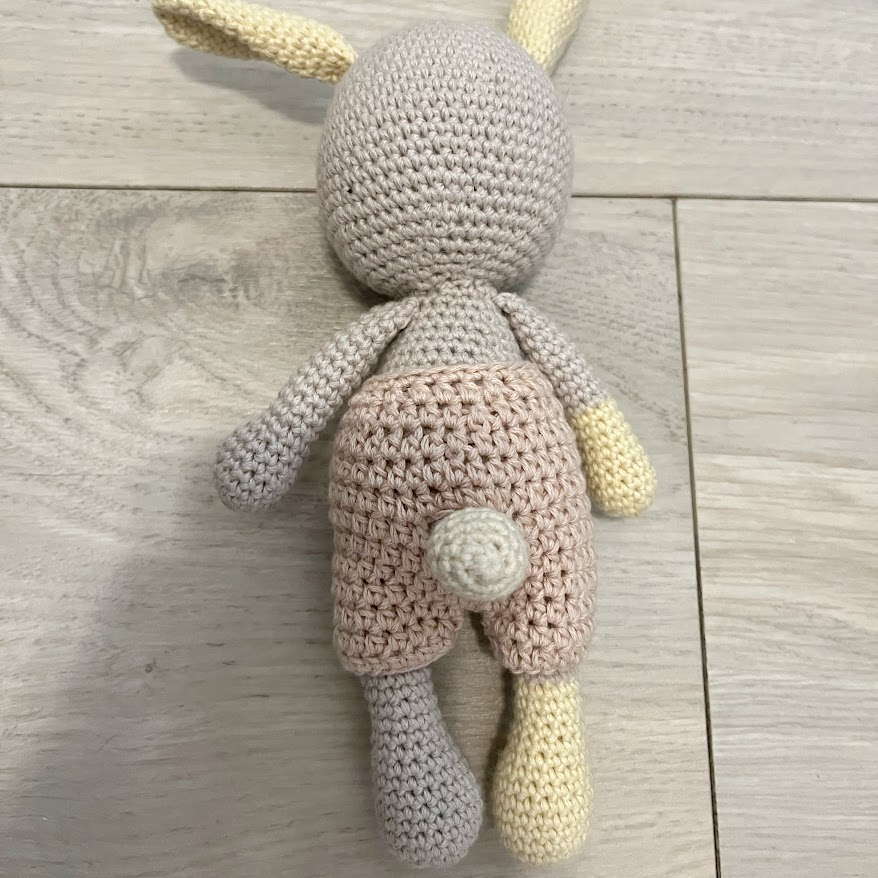
- Attach the body to the head between rounds 25 and 26. To stabilize the neck, add a small amount of stuffing before closing the hole.
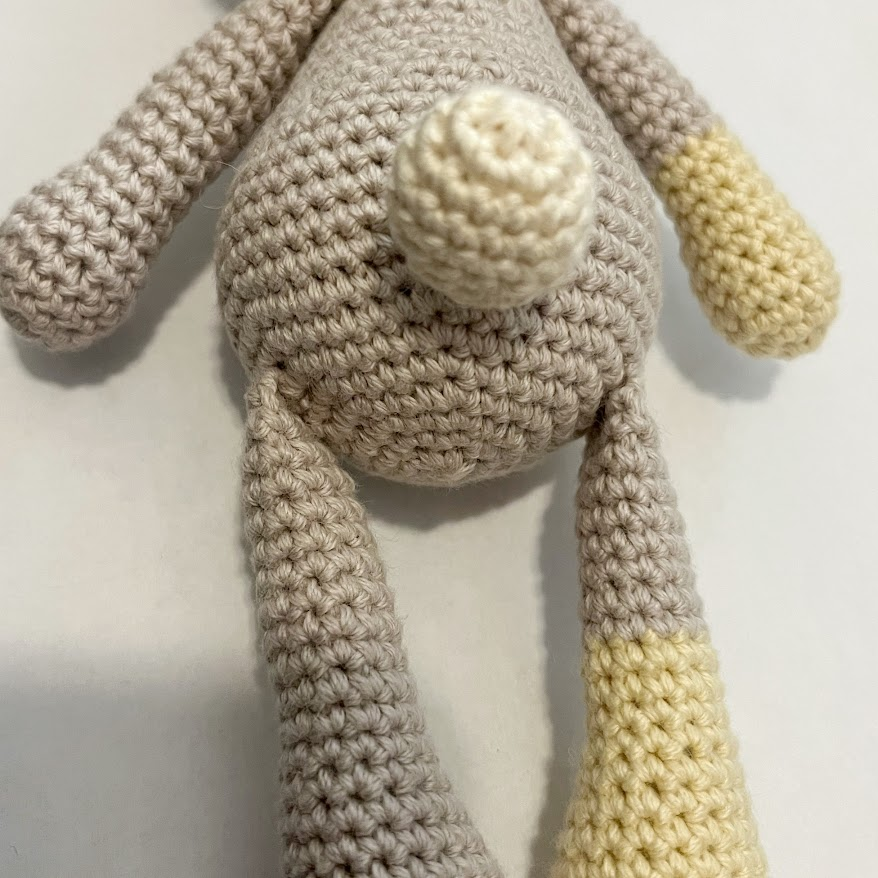
- Sew the arms between rounds 25 and 26 of the body, about 7 stitches apart (see picture 18).
- Sew the legs between rounds 7 and 8 of the body, about 12 stitches apart.
- Sew the ears between rounds 7 and 8 of the head, about 16 stitches apart.
- Sew the tail over rounds 7 and 8 of the body, about 6 stitches from each leg (see picture 16).
- Slip the pants on over the feet (see picture 17).
- Apply a small amount of blush to the cheeks.
Photo Gallery: